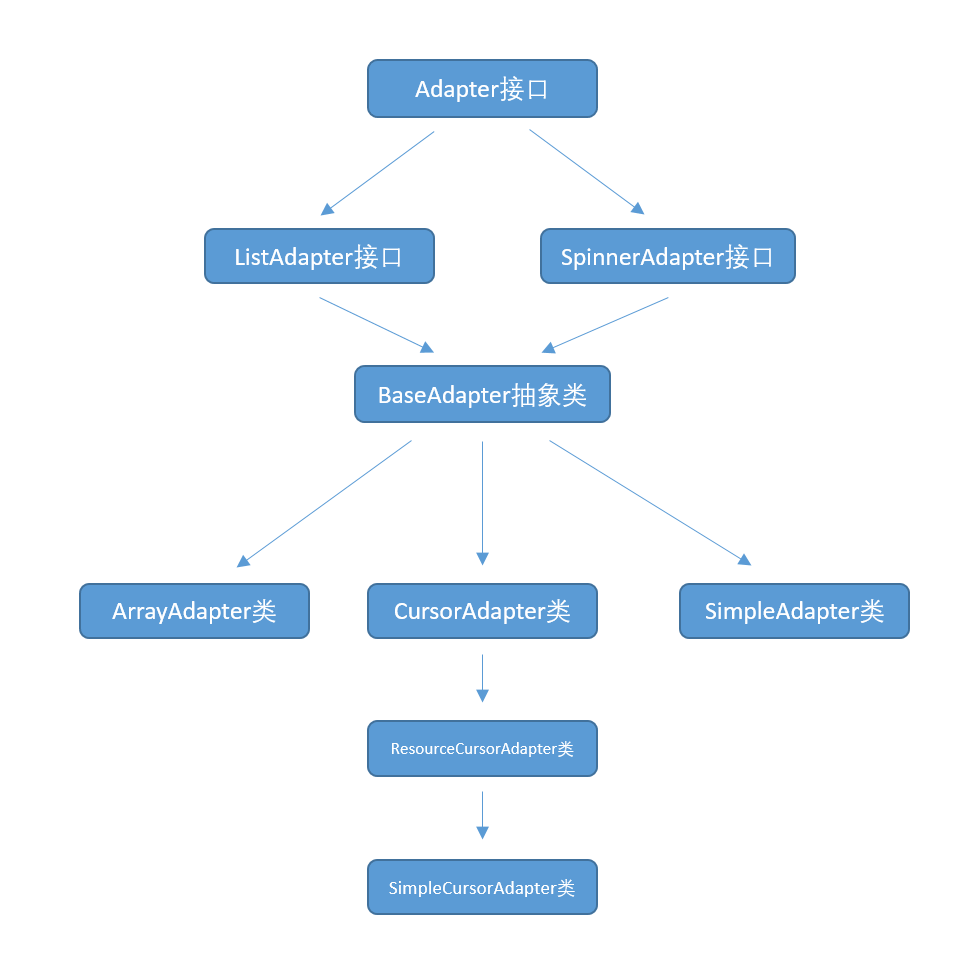
Adapter 只是一個接口,其派生了ListAdapter和SpinnerAdater兩個子接口。
ListAdater為AbsListView提供列表項,SpinnerAdater為AbsSpinner提供列表項。
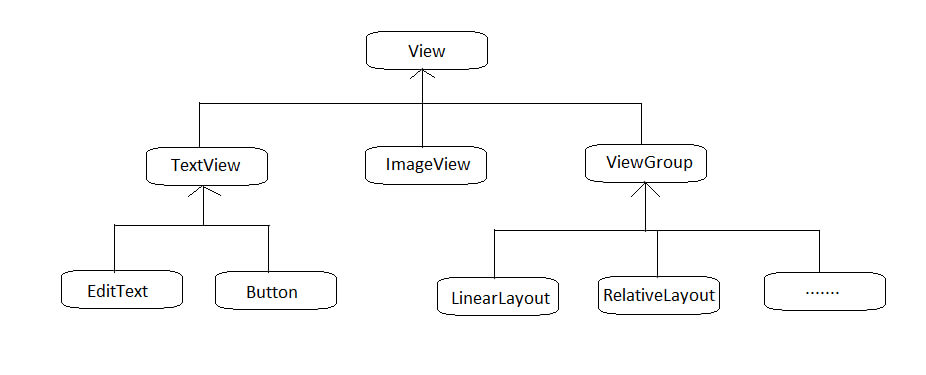
以下是Adapter相關類的關係圖

Adapter常用的實現類:
- ArrayAdapter: 通常用於將數組或者List集合的多個值包裝成多個列表項。
- SimpleAdapter: 用於將List集合的多個對象包裝成多個列表項。
- SimpleCursorAdapter: 與SimpleAdapter基本相似,只是用於包裝Cursor提供的數據。
- BaseAdapter: 通常用於被擴展。擴展BaseAdapter可以對各列表項進行最大限度地定製。
使用ArrayAdapter創建ListView
修改activity_main.xml
1
2
3
4
5
6
7
8
9
10
11
12
13
14
15
16
17
18
19
20
21
| <LinearLayout xmlns:android="http://schemas.android.com/apk/res/android"
xmlns:app="http://schemas.android.com/apk/res-auto"
android:orientation="vertical"
android:layout_width="match_parent"
android:layout_height="match_parent"
>
<ListView
android:layout_width="match_parent"
android:layout_height="wrap_content"
android:id="@+id/list1"
android:divider="#f00"
android:dividerHeight="2px"
android:headerDividersEnabled="false"></ListView>
<ListView
android:layout_width="match_parent"
android:layout_height="wrap_content"
android:id="@+id/list2"
android:divider="#0f0"
android:dividerHeight="2px"
android:headerDividersEnabled="false"></ListView>
</LinearLayout>
|
android:divider: 可以實現分割線,可以用圖片或者顏色
android:dividerHeight 設置分割線的高度
android:headerDividersEnabled 是否顯示頭部的分割線,默認是true
修改MainActivity.java
1
2
3
4
5
6
7
8
9
10
11
12
13
14
15
16
17
| public class MainActivity extends AppCompatActivity {
@Override
protected void onCreate(Bundle savedInstanceState) {
super.onCreate(savedInstanceState);
setContentView(R.layout.activity_main);
ListView list1 = (ListView) findViewById(R.id.list1);
String [] arr1 = {"孫悟空","豬八戒","牛魔王"};
ArrayAdapter<String> adapter1 = new ArrayAdapter<String>(this,R.layout.array_item,arr1);
list1.setAdapter(adapter1);
ListView list2 = (ListView) findViewById(R.id.list2);
String[] arr2 = { "java","hibernate","spring","android"};
ArrayAdapter<String> adapter2 = new ArrayAdapter<String>(this,R.layout.checked_item,arr2);
list2.setAdapter(adapter2);
}
}
|
ArrayAdapter<String> adapter1 = new ArrayAdapter<String>(this,R.layout.array_item,arr1);
ArrayAdapter傳入了三個參數:
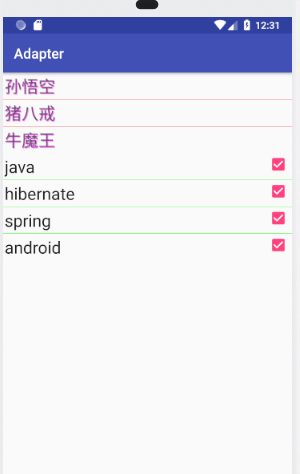
以上代碼可以看到,該數組或List包含多少個元素,就將會生成多少個列表項,每個列表項都是TextView組件。
arr1有三個數據,則會生成一個包含三個列表項的ArrayAdapter,每個列表項的組件外觀由R.layout.array_item佈局文件(該佈局文件只是一個TextView)控制。
新建array_item.xml
1
2
3
4
5
6
7
8
9
10
11
12
| <?xml version="1.0" encoding="utf-8"?>
<TextView
xmlns:android="http://schemas.android.com/apk/res/android"
android:layout_width="match_parent"
android:layout_height="wrap_content"
android:id="@+id/TextView"
android:textSize="24dp"
android:padding="10px"
android:shadowColor="#f0f"
android:shadowDx="4"
android:shadowDy="4"
android:shadowRadius="2"/>
|
TextView-shadow 陰影實現方式
android:shadowColor:陰影的顏色
android:shadowDx:水平方向上的偏移量
android:shadowDy:垂直方向上的偏移量
android:shadowRadius:是陰影的的半徑大小,值也大,陰影越大
新建 checked_item.xml
1
2
3
4
5
6
7
8
9
10
11
12
| <?xml version="1.0" encoding="utf-8"?>
<CheckedTextView
xmlns:android="http://schemas.android.com/apk/res/android"
android:id="@+id/checktextview"
android:layout_width="match_parent"
android:layout_height="wrap_content"
android:textSize="24dp"
android:padding="10px"
android:checked="true"
android:checkMark="?android:listChoiceIndicatorMultiple"
/>
|
運行結果:
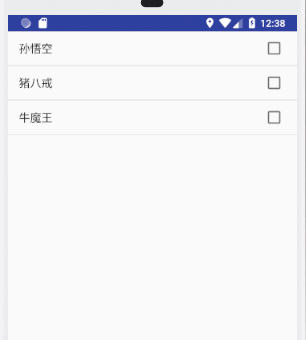
基於ListActivity實現列表
如果程序僅僅只是顯示一個列表,那麼可以無需通過設置xml來實現,而是直接讓Activity繼承ListActivity來實現。
修改MainActivity.java
1
2
3
4
5
6
7
8
9
10
11
|
public class Main2Activity extends ListActivity {
    @Override
    public void onCreate(Bundle savedInstanceState){
        super.onCreate(savedInstanceState);
        String[] atr = {"孫悟空","豬八戒","牛魔王"};
        ArrayAdapter <String> adapter = new ArrayAdapter<String>(this,android.R.layout.simple_list_item_multiple_choice,atr);
        setListAdapter(adapter);

    }
}
|
可以看到,不用使用setContentView()去調用佈局文件。
運行結果: